

Overview
HTML Elements
Below is just about everything you’ll need to style in the theme. Check the source code to see the many embedded elements within paragraphs.
Heading 1
Heading 2
Heading 3
Heading 4
Heading 5
Heading 6
Body text
Lorem ipsum dolor sit amet, test link adipiscing elit. This is strong. Nullam dignissim convallis est. Quisque aliquam.
This is emphasized. Donec faucibus. Nunc iaculis suscipit dui. 53 = 125. Water is H2O. Nam sit amet sem. Aliquam libero nisi, imperdiet at, tincidunt nec, gravida vehicula, nisl. The New York Times (That’s a citation). Underline.Maecenas ornare tortor. Donec sed tellus eget sapien fringilla nonummy. Mauris a ante. Suspendisse quam sem, consequat at, commodo vitae, feugiat in, nunc. Morbi imperdiet augue quis tellus.
HTML and CSS are our tools. Mauris a ante. Suspendisse quam sem, consequat at, commodo vitae, feugiat in, nunc. Morbi imperdiet augue quis tellus. Praesent mattis, massa quis luctus fermentum, turpis mi volutpat justo, eu volutpat enim diam eget metus.
Blockquotes
Lorem ipsum dolor sit amet, test link adipiscing elit. Nullam dignissim convallis est. Quisque aliquam.
List Types
Ordered Lists
- Item one
- sub item one
- sub item two
- sub item three
- Item two
Unordered Lists
- Item one
- Item two
- Item three
Tables
| Header1 | Header2 | Header3 |
|---|---|---|
| cell1 | cell2 | cell3 |
| cell4 | cell5 | cell6 |
| cell1 | cell2 | cell3 |
| cell4 | cell5 | cell6 |
| Foot1 | Foot2 | Foot3 |
Code Snippets
Syntax highlighting is a feature that displays source code, in different colors and fonts according to the category of terms. This feature facilitates writing in a structured language such as a programming language or a markup language as both structures and syntax errors are visually distinct. Highlighting does not affect the meaning of the text itself; it is intended only for human readers.1
Pygments Code Blocks
To modify styling and highlight colors edit /_sass/_pygments.scss.
#container {
    float: left;
    margin: 0 -240px 0 0;
    width: 100%;
}
<nav class="pagination" role="navigation">
{% if page.previous %}
<a href="{{ site.url }}{{ page.previous.url }}" class="btn" title="{{ page.previous.title }}">Previous article</a>
{% endif %}
{% if page.next %}
<a href="{{ site.url }}{{ page.next.url }}" class="btn" title="{{ page.next.title }}">Next article</a>
{% endif %}
</nav><!-- /.pagination -->module Jekyll
class TagIndex < Page
def initialize(site, base, dir, tag)
@site = site
@base = base
@dir = dir
@name = 'index.html'
self.process(@name)
self.read_yaml(File.join(base, '_layouts'), 'tag_index.html')
self.data['tag'] = tag
tag_title_prefix = site.config['tag_title_prefix'] || 'Tagged: '
tag_title_suffix = site.config['tag_title_suffix'] || '–'
self.data['title'] = "#{tag_title_prefix}#{tag}"
self.data['description'] = "An archive of posts tagged #{tag}."
end
end
endStandard Code Block
<nav class="pagination" role="navigation">
    {% if page.previous %}
        <a href="{{ site.url }}{{ page.previous.url }}" class="btn" title="{{ page.previous.title }}">Previous article</a>
    {% endif %}
    {% if page.next %}
        <a href="{{ site.url }}{{ page.next.url }}" class="btn" title="{{ page.next.title }}">Next article</a>
    {% endif %}
</nav><!-- /.pagination -->
Fenced Code Blocks
To modify styling and highlight colors edit /_sass/_coderay.scss. Line numbers and a few other things can be modified in _config.yml. Consult Jekyll’s documentation for more information.
#container {
float: left;
margin: 0 -240px 0 0;
width: 100%;
}
<nav class="pagination" role="navigation">
    {% if page.previous %}
        <a href="{{ site.url }}{{ page.previous.url }}" class="btn" title="{{ page.previous.title }}">Previous article</a>
    {% endif %}
    {% if page.next %}
        <a href="{{ site.url }}{{ page.next.url }}" class="btn" title="{{ page.next.title }}">Next article</a>
    {% endif %}
</nav><!-- /.pagination -->
module Jekyll
class TagIndex < Page
def initialize(site, base, dir, tag)
@site = site
@base = base
@dir = dir
@name = 'index.html'
self.process(@name)
self.read_yaml(File.join(base, '_layouts'), 'tag_index.html')
self.data['tag'] = tag
tag_title_prefix = site.config['tag_title_prefix'] || 'Tagged: '
tag_title_suffix = site.config['tag_title_suffix'] || '–'
self.data['title'] = "#{tag_title_prefix}#{tag}"
self.data['description'] = "An archive of posts tagged #{tag}."
end
end
end
GitHub Gist Embed
An example of a Gist embed below.
Buttons
Make any link standout more when applying the .btn class.
<a href="#" class="btn btn-success">Success Button</a>Notices
Watch out! You can also add notices by appending {: .notice} to a paragraph.
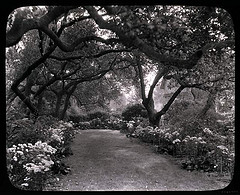
Images
Here are some examples of what a post with images might look like. If you want to display two or three images next to each other responsively use figure with the appropriate class. Each instance of figure is auto-numbered and displayed in the caption.
Figures (for images or video)
One Up

Vero laborum commodo occupy. Semiotics voluptate mumblecore pug. Cosby sweater ullamco quinoa ennui assumenda, sapiente occupy delectus lo-fi. Ea fashion axe Marfa cillum aliquip. Retro Bushwick keytar cliche. Before they sold out sustainable gastropub Marfa readymade, ethical Williamsburg skateboard brunch qui consectetur gentrify semiotics. Mustache cillum irony, fingerstache magna pour-over keffiyeh tousled selfies.
Two Up
Apply the half class like so to display two images side by side that share the same caption.
<figure class="half">
    <a href="/images/image-filename-1-large.jpg"><img src="/images/image-filename-1.jpg"></a>
    <a href="/images/image-filename-2-large.jpg"><img src="/images/image-filename-2.jpg"></a>
    <figcaption>Caption describing these two images.</figcaption>
</figure>
And you’ll get something that looks like this:


Three Up
Apply the third class like so to display three images side by side that share the same caption.
<figure class="third">
	<img src="/images/image-filename-1.jpg">
	<img src="/images/image-filename-2.jpg">
	<img src="/images/image-filename-3.jpg">
	<figcaption>Caption describing these three images.</figcaption>
</figure>
And you’ll get something that looks like this:
